Generate AI Powered
-
Images
-
Videos
-
Scripts
CapCut Mac Launched
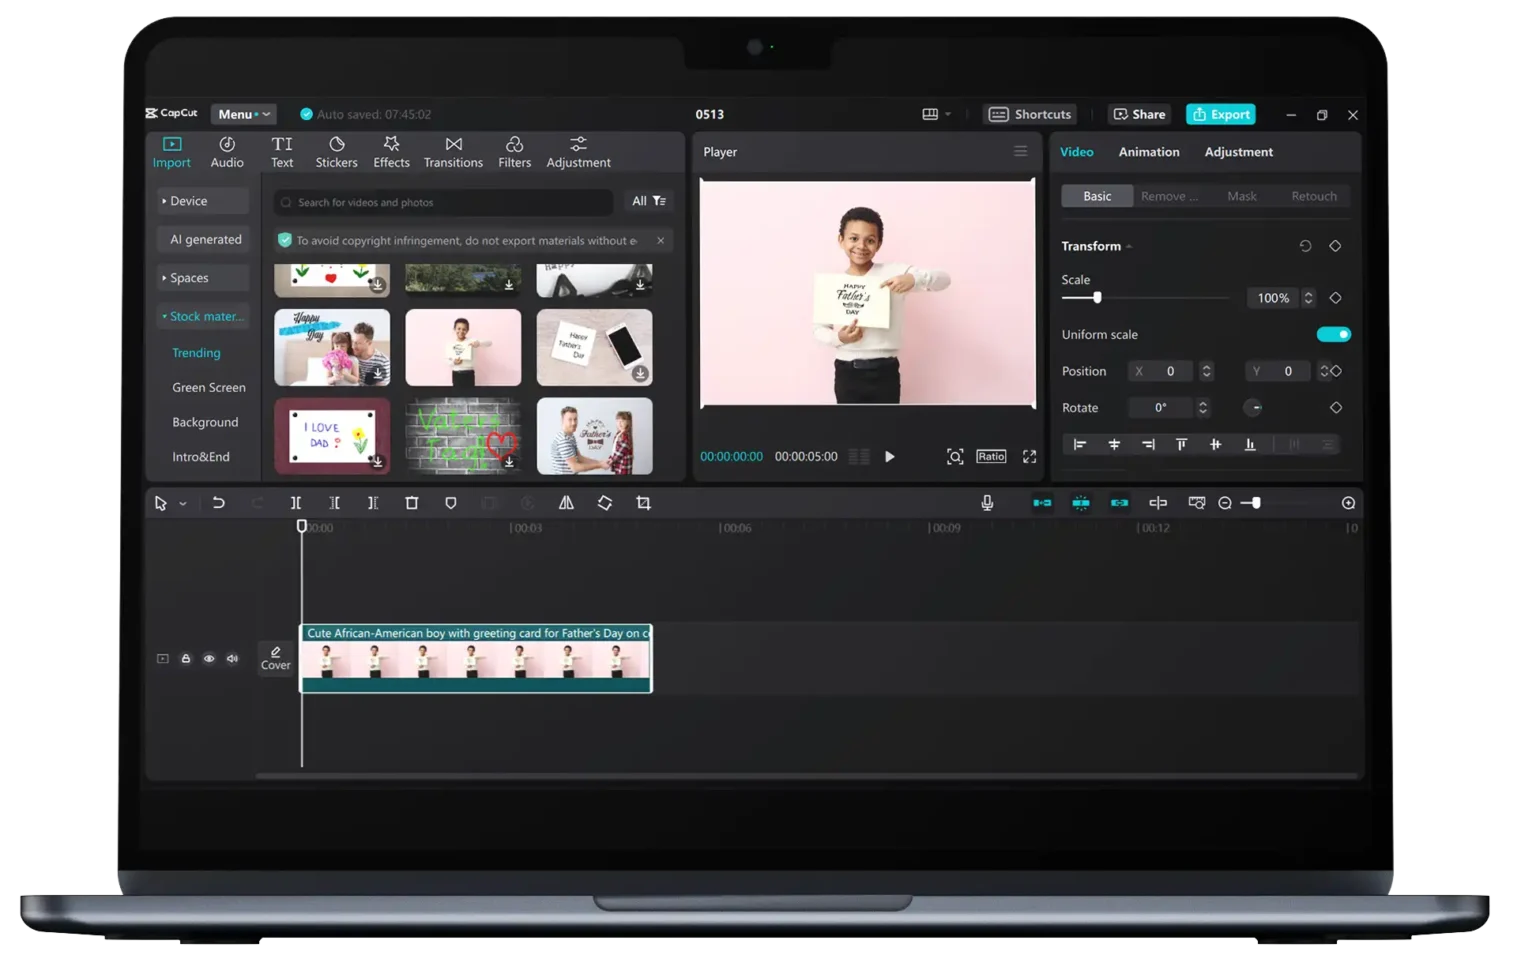
CapCut for Mac is a simple yet powerful video editor built for creators who want to cut clips, add effects, improve audio, and export polished videos from one workspace. Its clean timeline, ready-made assets, and beginner-friendly tools make it suitable for social media videos, YouTube content, and everyday editing.
Editing on the Timeline
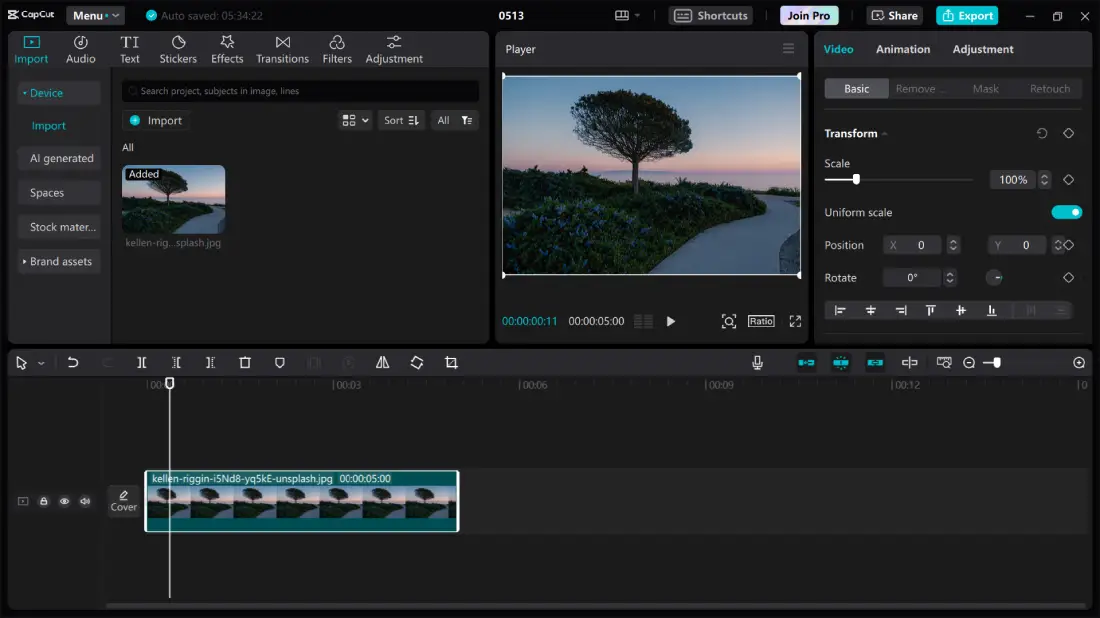
CapCut for macOS keeps the main editing tools in one workspace. You can import files from your Mac or access audio, text, stickers, effects, transitions, filters, and adjustment tools from the top menu. The preview window sits in the center, while controls for scale, position, rotation, and alignment appear on the right. The timeline is spacious and easy to understand, although the number of panels can make the interface feel slightly crowded on a smaller MacBook screen.
Exporting and Sharing Your Video
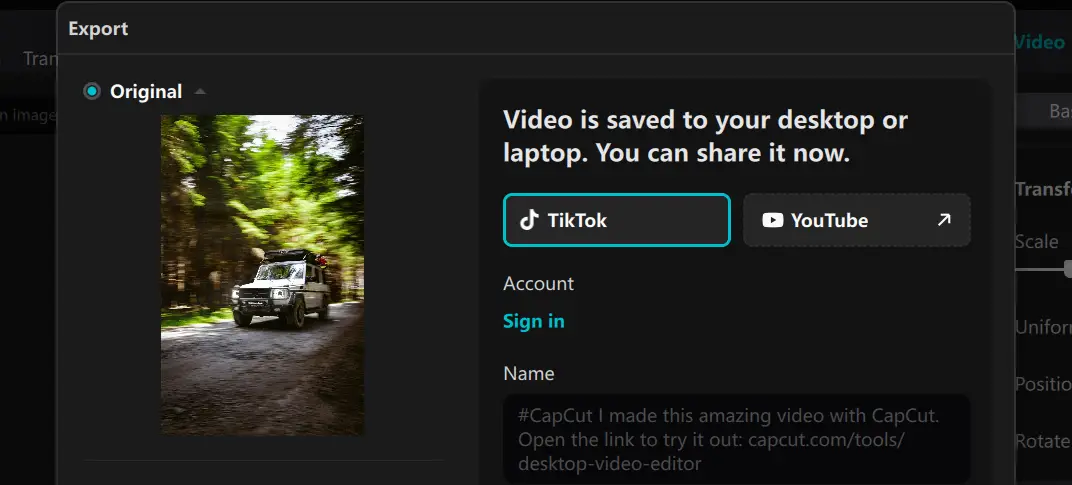
The export screen is simple and focused. Once CapCut saves the video to your Mac, it gives you direct options to share it on TikTok or YouTube. You can also add a video name or caption before sharing. This is convenient for social media creators because it removes a few extra upload steps. However, direct sharing requires you to sign in, and the visible sharing options are mainly limited to TikTok and YouTube.
Using Built-In Stock Media
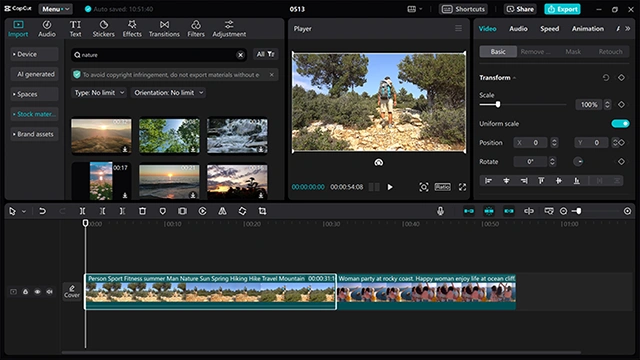
CapCut includes a stock media section where you can search for ready-made video clips without leaving the editor. The filters let you narrow the results by media type and orientation, which is useful when creating vertical or horizontal videos. Clips can be added directly to the timeline and combined with your own footage. It is a helpful feature for filling gaps in a project, but finding the right stock clip may still take time because many results are displayed together.
Adding Transitions Between Clips
The transitions panel offers several effects, including blur, split, stretch, swirl, and fade-style transitions. Each option includes a visual preview, making it easier to understand how the transition will look before applying it. The effect can then be placed between clips on the timeline. The collection gives beginners plenty of creative choices, although using too many dramatic transitions can quickly make a video look distracting or over-edited.

Minimum System Requirements for CapCut Mac
It’s important to examine the system requirements when deciding to install CapCut for Mac to enable effortless running. Here are the minimum compatibility specifications to consider:
-
Operation SystemmacOS 10.15 and later
-
Processordual-core processor
-
RAM4GB or above
-
StorageAt Least 2GB
How to download and install CapCut on Mac
-
Make sure to download CapCut Desktop for Mac from this page
-
After that, locate the file in the downloads folder and double-tap to start the installer.
-
Now, follow the on-screen instructions guided by the Mac installation wizard.
-
Once done, the software will pop up on your screen, ready to work.

How to use CapCut on Mac?
CapCut ensures convenience for Apple users.
- Open CapCut, select New Project, name it, and enable proxies if your Mac struggles with smooth playback.
- Click Import, choose your videos, images, or audio, and drag them onto the timeline.
- Use the blade tool by pressing B, remove unwanted parts, and arrange the clips in the correct order.
- Select 16:9 for YouTube videos or 9:16 for TikTok, Reels, and YouTube Shorts.
- Change the clip’s size, position, speed, colors, volume, noise reduction, and other settings from the right panel.
- Add text, transitions, effects, music, stickers, stock footage, or B-roll from the editing menu.
- Click Export, choose the resolution, bitrate, codec, and save location, and then export the finished video.
CapCut Mac FAQs
-
Can I Use CapCut on Mac?
Yes. CapCut has a native desktop app for macOS, so you can install it directly from this page or the Mac App Store. A browser-based editor is also available when you do not want to install the software.
-
Is CapCut an Apple App?
No. CapCut is not developed or owned by Apple; its App Store developer is listed as ByteDance Pte. Ltd. It is simply available for Apple devices, including iPhone, iPad, and Mac.
-
Do I Need an Emulator to Run CapCut for Mac?
No emulator is required because CapCut provides a native macOS application. Its basic requirements include macOS 10.15 or later, a dual-core processor, 4GB of RAM, and around 2GB of installation space, though 8GB of RAM and a newer macOS version are better for demanding projects and 4K editing.
-
What File Formats CapCut for Mac Supports?
CapCut Desktop can import common video formats such as MP4, MOV, M4V, AVI, MKV, and WebM, along with popular audio and image files such as MP3, JPG, and PNG. Finished videos can be exported as MP4 or MOV, with resolution options up to 4K on supported Macs. Compatibility can still depend on the file’s codec and your CapCut version, so an MP4 or JPG file may occasionally require conversion before importing.